| | Effects of wind erosion | Principles of emergency control measures | Specific control measures | Summary | More information
Under normal conditions, wind erosion can be prevented by protecting the soil with a cover of growing plants or crop residues. However, drought or fire can leave the soil bare and at risk of wind erosion, even if preventive measures have been used.
If your soil begins to drift, don't give up. Drifting can usually be controlled if appropriate emergency measures are undertaken as soon as the soil starts to blow.
Effects of Wind Erosion
When soil can be seen drifting (Figure 1), at least 4 or 5 tons of soil per acre (9 to 11 tonnes/ha) are being lost each day. For each inch of topsoil lost to wind erosion, crop yields are lowered by several bushels per acre. Wind erosion removes soil nutrients, smaller soil particles and organic matter, making the eroded field less productive (Figure 2). Wind erosion can harm air quality and can reduce water quality if eroded particles drift into streams and lakes. Certain herbicides remain with the soil even when transported by wind and may affect crop growth where soil drift is deposited.
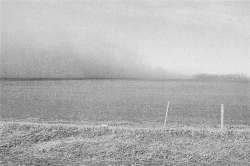
Figure 1. Wind erosion reduces soil productivity.
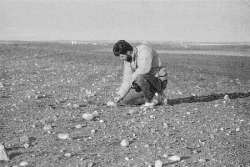
Figure 2. Wind erosion removes smaller particles
Principles of Emergency Control Measures
- Stop erosion at the focal points. The focal points, such as knolls and sandy pockets, are the first areas in the field to blow. Wind-blown particles pulverize the soil downwind, which can start the entire field drifting. Controlling erosion at the focal points can often prevent the whole field from drifting.
- Protect the soil surface with manure or anchored straw.
- Produce a cloddy soil surface. Soil clods hold the soil and trap drifting soil.
- Create ridges in soils where clods cannot be created. Ridges trap drifting soil and reduce wind speeds at the soil surface.
- Carry out control measures at right angles to the prevailing wind.
- Remove harrows and operate equipment slowly to avoid soil pulverization.
- If the field has a history of wind erosion, use the narrower of the recommended spacings for the control measures discussed below.
- Once erosion has been brought under control, monitor the field and take further action if it begins to erode again.
Specific Control Measures
Emergency control measures involve either increasing the surface roughness of a field by creating ridges or clods, or covering the soil with straw or manure. Seven specific measures for various soil conditions are described below and summarized in Table 1.
1. Apply and anchor straw
Apply and anchor straw in the soil. Longer straw is preferred to well chopped, short straw. Straw can be anchored with light disking or can be hairpinned into the ground with a weighted double disk drill (no packer). Some municipalities have access to a straw crimper, designed especially to anchor the straw (Figure 3).

Figure 3. A straw crimper can be sued to anchor straw.
Table 1. Summary of Emergency Measures to Control Wind Erosion*
Soil Condition | Anchored straw | Manure | Rows
of straw
bales | Listing | Chisel
points | Ripping | Large
ridges |
| Soil blowing at focal points only |  |
|
| x | x | x | x | ? | – | x |
|
| – | x | x | – | x | x | – |
| Sandy soils, unfrozen | |
- thin surface layer is drifting,
but soil is firm and moist underneath
| – | – | – | x | ? | – | – |
- normal tillage layer is dry and loose
| - | – | – | x | – | – | x |
| Sandy soils, frozen | – | – | – | – | x | x | – |
| Loam to clay soils, unfrozen | |
- thin surface layer is drifting,
but soil is firm and moist underneath
| – | – | – | – | x | – | – |
- normal tillage layer is dry, loose and cloddy
| – | – | – | x | – | – | – |
- normal tillage layer is dry,
loose and pulverized
| – | – | – | x | – | – | – |
| Loam to clay soils, frozen | – | – | – | – | x | x | – |
| Crop emerged, spring seeded | |
- only focal points are drifting
| x | x | x | x | ? | – | – |
- most of field is drifting
| – | – | – | – | ? | – | – |
| Crop emerged, winter cereals on frozen soil | |
- only focal points are drifting
| – | x | x | – | x | x | – |
- most of field is drifting
| – | – | – | – | x | x | – |
* x : recommended
– : not recommended
? : only used if a cloddy surface is produced
Approximate straw application rates are based on soil texture as follows:
- sands and pulverized heavy clays: 1.5 to 4 tons/acre (3.4 to 9 tonnes/ha)
- fine sandy loams to silty loams: 1 to 2 tons/acre (2.2 to 4.5 tonnes/ha)
- silty clay loams to clay loams to clays: 0.5 to 1.5 tons/acre (1.1 to 3.4 tonnes/ha)
2. Apply manure
Apply manure to the soil surface at about 30 to 50 tons/acre (70 to 110 tonnes/ha). This amount is equivalent to about 0.25 to 0.5 inches (0.6 to 1.3 cm) spread evenly on the soil surface. Do not work the manure into the soil.
Manure also provides long-term benefits by improving soil fertility and tilth. Ensure that runoff contaminated with manure does not enter nearby streams and lakes because manure degrades water quality.
3. Set up rows of straw bales
Set up rows of small, rectangular straw bales at right angles to the prevailing wind (Figure 4). The rows should be about 30 to 50 feet (9 to 15 m) apart.
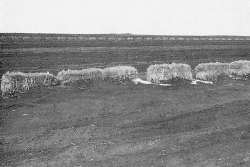
Figure 4. Rows of bales are set up at right angles to the wind.
4. Create ridges by listing
Listing produces ridges and brings up firmer subsoil (Figure 5). This method is used for sandy or pulverized clay soils. Use lister shovels (Figure 6) or modify conventional shovels (place washers between the shovel and shank at the top bolt, so the shovel points downward) on a heavy-duty cultivator.
Till deep enough to penetrate the firmer subsoil, so clods are brought to the surface. In deep sands, it may not be possible to bring clods to the surface, but the ridges will still help to control wind erosion.
Ridges should be at right angles to the wind. As much as possible, they should also be at right angles to the field's slope because furrows parallel to the slope will greatly increase the risk of water erosion in the spring.
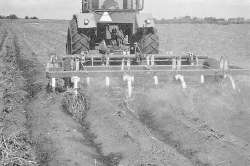
Figure 5. Listing produces ridges in sandy soil.
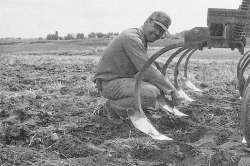
Figure 6. Lister shovels
Ridges should be 4 to 8 inches (10 to 20 cm) high. Ridge width should be about four times the ridge height. For example, if the ridges are 4 inches high, they should be about 16 inches (40 cm) wide.
The soil should be thrown into well rounded ridges. Pointed ridges can increase soil movement. If the furrows fill in with drifted soil, list again to create new furrows between the old furrows. Normal tillage operations parallel to the ridges will level the field for seeding.
5. Create cloddy ridges with chisel points
Use chisel points mounted on a heavy-duty cultivator to produce small ridges of soil clods at right angles to the wind. Remove harrow attachments from the cultivator because harrows will break up the clods. To avoid overworking the soil, remove any shanks that are not needed for the desired chisel spacing.
Clods are broken down by repeated freezing and thawing, wetting and drying, and pulverization from drifting soil. Clods in loam soils are normally very resistant to wind erosion (Figure 7). Clods in clay soils tend to break down. It is difficult to form stable clods in sandy soils.
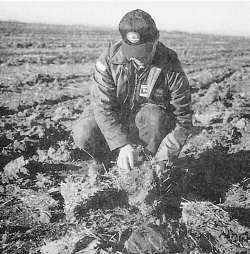
Figure 7. Clods in loam soils usually resist breakdown.
- Thin surface layer drifting, but soil is firm and moist underneath: Space chisels 2 to 4 feet (0.6 to 1.2 m) apart on sandy soils and pulverized clay soils, and 2 to 6 feet (0.6 to 1.8 m) apart on loams and clay soils. Till deep enough to bring clods up to the surface. Operate slowly so the soil is not pulverized. If clods are not being produced in sandy soils and pulverized clay soils, try listing.
- Crop seeded: If erosion becomes serious in a seeded field, chiseling can prevent destruction of the entire crop. With a chisel spacing of 5 to 6 feet (1.5 to 1.8 m), yield loss will normally be less than if the field is left to drift badly.
- Frozen soil: Space chisels 2 to 6 feet (0.6 to 1.8 m) apart. Till deep enough to bring clods up to the surface. The chisel points must be sharp. The cultivator may have to be weighted for proper penetration. Lowering the hitch point on the tractor also improves soil penetration.
6. Create cloddy ridges by ripping
Use a subsoiler ripping point to produce ridges of clods in frozen soil (Figures 8 and 9). The subsoiler is pulled behind a grader or a cat. Subsoiler points must be replaced daily to ensure penetration. A wide blade cultivator can also be modified by mounting 6-inch (15-cm) wide chisel blades on existing shanks or replacing the shanks with subsoiler rippers and adding sufficient weight to get good penetration.
Work at right angles to the prevailing wind. Where possible, the ridges should also be at right angles to the slope of the field to reduce the risk of water erosion.
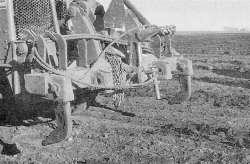
Figure 8. Subsoiler ripping points
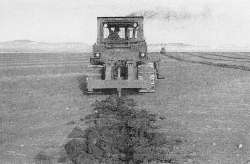
Figure 9. Ripping produces cloddy ridges in frozen soil.
Till deep enough to create ridges at least 4 inches (10 cm) high. The spacing between ridges should be about 6 to 30 feet (1.8 to 9 m). Use the narrower spacing if the field has a history of wind erosion.
If a field seeded to winter cereals begins to drift when the soil is frozen, ripping can be an effective control measure. Two rows of crop will be destroyed for each pass of a subsoiler point. The yield loss from ripping will certainly be less than the loss if the field is allowed to drift.
7. Create large ridges
The blade of a grader can be placed at a steep angle to create ridges about 14 inches (35 cm) high and furrows about 18 inches (45 cm) deep. Create the ridges at the upwind sides of the furrows.
Ridges are spaced 10 to 30 feet (3 to 9 m) apart. Continued drifting may require the creation of additional ridges between the first ridges. Minor ridges and furrows will disappear over time. Major ridges and furrows will require leveling. If the field is leveled before seeding, straw should be anchored in the leveled area. Another option is to seed the undisturbed areas first, and then level and seed the ridge-and-furrow areas a few weeks later, after the crop has emerged in the undisturbed areas.
Considerations at seeding
Deposited drift soil is very susceptible to drifting again. Protect drift soil deposits by deep cultivation to bring up clods of the buried soil.
Minimize tillage before seeding. Pre-seeding tillage leaves the soil in a very erodible condition.
A hoe drill produces ridges that can reduce wind erosion if the furrows are at right angles to the prevailing wind. This method is especially important in sandy soils where it is difficult to leave a cloddy surface after seeding.
Packing makes soil more resistant to erosion unless the soil is pulverized in the process. A spiral coil packer can be effective.
Summary
Use emergency control measures if wind erosion is imminent or as soon as the soil starts to blow. Select the appropriate measure based on the soil condition. Some measures involve creating ridges at right angles to the prevailing wind. Others involve covering the soil with straw or manure. Once erosion has been brought under control, monitor the field. If the field begins to erode again, take further control measures.
Emergency control measures are not a long-term solution to wind erosion. Preventive measures, such as maintaining a crop residue cover, adding field shelterbelts or growing perennial crops, are essential to protect the soil.
More Information
Contact the Conservation and Development Branch of Alberta Agriculture, Food and Rural Development for more information on wind erosion control measures.
Some of the many publications on preventive measures include:
- An Introduction to Wind Erosion Control (Agdex 572-2)
- Field Shelterbelts for Soil Conservation (Agdex 277/20-3)
- the Direct Seeding factsheet series.
Source: Agdex 572-1. |
|