| | Factsheet topics | Background | Varieties | Methods of production | Stages of production
Commercial microgreens are a high value crop for human consumption. These plants offer healthy, high nutrition options for consumers and strong potential returns for producers.
A “microgreen” is a general term used to describe an edible plant in its juvenile growth stage. It is important to note that a microgreen has been harvested (removed) from the plant’s seed and root system prior to consumption, unlike a “sprout,” which is consumed as the entire plant including seed and root system.
Factsheet topics
Background
Varieties
Methods of production
Stages of production
Seed sources
Seed storage and preparation
Seeding
Common seeding densities
Germination and growth
Harvesting
Washing and drying
Packaging
Labeling
Storage/shipping
Background
Depending on the plant species, a microgreen typically consists of the plant stem, cotyledons (initial leaves present in the seed) and the first “true leaves” of that plant. Based on the grower and customer’s preference, microgreens may be harvested before or directly after the first true leaves have appeared.
Around 5 to 7.5 cm (2 to 3 in.) in size, microgreens are sought after for various characteristics including, but not limited to, nutrition, flavour, colour, form and texture.
Microgreens have received a substantial amount of exposure over the last few years because of their potential profitability thanks to a relatively short production cycle, low input costs and small footprint (do not take large amounts of space or resources to produce).
However, this profitability is ultimately related to the ability to sell such a product, so care and attention should be paid to the market you plan to sell into. As with all crops, producing the crop is one endeavour, but selling it is another one altogether. Producers need to connect with target markets and clients early in business development to make sure they can sell their crops (Figure 1).
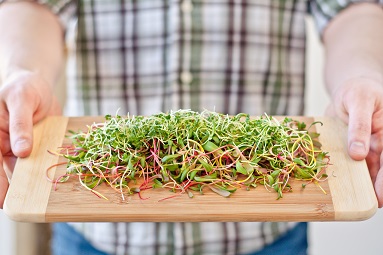
Figure 1. Demand for products like microgreens has been increasing.
Varieties
Many microgreen varieties can be grown, but the most important factor for producers to consider is that the specific plant must be fit and safe for human consumption. Within the context of this important factor, well over a hundred different species of plants are commonly grown and sold as microgreens (e.g. mustard). This figure does not include the hundreds of cultivar varieties of these plants (e.g. Golden Frills mustard, Ruby Streaks mustard, or Green Wave Mustard).
Microgreens have a quick crop cycle, but there are differences in growth rates between different species and varieties. Vegetables grown as microgreens are ready for harvest in about 7 to 14 days, but herbs grown as microgreens tend to be comparatively slow growing, maturing in 16 to 25 days.
See the list below with common species grouped by their crop cycles.
Common species:
- Fast growing vegetables (7 to 14 days)◦cabbage
- corn
- cress
- kale
- kohlrabi
- mustard
- radish
- Slow growing vegetables (15 to 25 days)
- amaranth
- arugula
- beet
- carrot
- Swiss chard
- scallion
- Slow growing herbs (15 to 30 days)◦anise
- basil
- cilantro
- dill
- fennel
- parsley
- saltwort
- shisho
- sorrel
NOTES:
No matter what plants you are growing, for the safety of consumers with allergies, proper facility sanitation and procedures must be followed to prevent cross-contamination between species.
The other crucial aspect that is often overlooked is correct plant identification. “Accurate and traceable plant identification verification throughout the value chain will play a key role in ensuring the safety and legitimacy of the natural health products industry within Canada and around the world.” (Herb, Spice and Specialty Agriculture Association (HSSA)). A great resource for proper plant identification has been created by the HSSA (see url https://www.hssa-sk.ca/plant-identification.html).
Methods of production
Growers will need to decide how they wish to produce their crops. Each type of production has its benefits, maintenance requirements and difficulties. The following methods of production have been utilized on a commercial scale to produce microgreens:
- Soil-based
- garden beds
- raised planters
- Various forms of hydroponic crop production
- substrate culture where the roots grow within a pH neutral media
- solution culture where the roots grow within nutrient solutions
- Nutrient Film Technique (NFT) where the roots are grown in a constant flow of nutrient rich water (nutrient solution)
- aeroponics where the root systems are suspended and misted with a nutrient solution
The stages of production will be generally the same regardless of the facility utilized. However, it is important to note that producing microgreens requires a facility that is food-safe, meeting local standards and regulations. More information on this important topic can be found in the factsheet Commercial Microgreens: Food Safety and Third-party Certifications, Agdex 268/089-1.
Stages of production
Seed sources
Producing microgreens is very seed intensive compared to conventional crop production? The cost of seed can add a lot to the overall cost of production and, in some cases, will be the tipping point between a profitable product or not.
Securing multiple, credible and affordable bulk seed suppliers is a must. Having more than one main supplier reduces the risk of shortages, variety limitations, food safety and traceability issues. It is recommended that a producer partner with suppliers that offer traceability, food-safety assurance and/or organic certifications for their products.
Seed storage and preparation
Seeds should be stored in secure, enclosed containers to avoid any contamination or pest issues. For the best viability, seeds should be stored in a cool (1 to 5�C), dry (3 to 10 per cent relative humidity), dark location. Seeds should not be allowed to become rehydrated while in storage; otherwise, the germination process could start prematurely, ultimately reducing seed viability.
Most seeds are dried to a moisture content of 3 to 6 per cent. For germination to occur, some seed species will require soaking in water (soaking a seed) or in an acidic solution (scarification, used to break the hard seed coat of certain species).
Each species has different requirements for germination, so it is critical that producers know their species and their propagation requirements. Soaking solutions, such as diluted hydrogen peroxide, can also be used as disinfectants, lowering the risk of pathogen and bacteria contamination that may be harboured on the seeds. Similarly, a hot water treatment may also help with disinfection.
Be aware that some seeds like arugula, basil, chia, cress, and flax fit into the category of mucilaginous seeds. With this type of seed, contact with water will cause a thick layer of a gluey/gel-like substance to form on the exterior of the seed. This layer helps maintain moisture to facilitate the seed’s germination. Growing these seeds may require extra steps and care to ensure proper germination. Mucilaginous seeds should not be soaked before planting.
Seeding
Regardless of the planting medium, seeds are shaken or mechanically seeded, so they are evenly distributed at a density corresponding to the type of seed and desired finished product.
To retain moisture after planting, growers add a thin layer of fine grade vermiculite, single-ply paper towel or a thin layer of soil-less growing media on top of the seeds. See the list below for common seeding densities.
Common seeding densities
- 60 g to 70 g
- mustard
- broccoli
- radish
- Swiss chard
- red cabbage
Germination and growth
To produce microgreens, a grower must become a master at reproducing the environment and requirements that seeds need to germinate. This approach could mean utilizing heating mats, extra lighting or complete darkness, less watering or more, depending on the species.
Environment: The optimal environment for microgreen production can be variety-specific, but a favourable temperature range of 18 to 24�C and relative humidity (RH) of 40 to 60 per cent would meet the needs of most plants. Increasing the temperature and humidity may raise the risk of pest and disease issues.
Within any growing environment, good air circulation (mixing, exchanging and circulation) is a must. Air circulation assists in producing a uniform temperature and humidity throughout the growing area.
Growers need to use horizontal air flow fans along with forced air or natural air vents to mix and exchange air within the growing space.
If plants are produced in a vertical rack system, attention must be paid to air flow between each layer; otherwise, air trapped between layers can quickly become stagnant, increasing the risk of disease. Air flow for a these systems can be managed with multiple smaller fans fastened at each level of growth on the rack systems.
Lighting: Many plants respond to artificial light differently than they do to natural light. Be aware of light duration, intensity and distance from the crop. For example, if the light source is located too far from the crop, stretching or “legginess” may occur. Crop colour may also appear washed-out when the light intensity is insufficient.
Some light systems, like some fluorescent lights, emit heat during their operation. When a facility has 150+ fluorescent lights, this effect could drastically influence the air temperature. In recent years, light-emitting diodes (LED) light fixtures have become more prevalent in enclosed production facilities (such as warehouses) because of the decreased heat emissions and ability to tailor the light spectrum to specific crops in production.
Operating lights for 12 to 18 hours per day to replace natural sunlight and 4 to 6 hours per day for supplemental lighting in a greenhouse environment will substantially increase the cost of microgreens production.
The energy required for LED lighting systems has been found to be much less than for fluorescent and halogen counterparts. However, the initial cost of LED lighting systems can still be prohibitively high despite substantial decreases in cost over the last few years.
To ensure a viable business, growers and potential growers should have a good understanding of the expected capital and operating costs of growing microgreens before producing.
Watering: Microgreen production requires consistent and calculated plant watering. The use of misting nozzles is recommended for the initial seed watering during germination to avoid displacing the seeds. Shower head nozzles can be introduced to the growth stage of watering to meet the increased water demands of the plants.
Regardless of the facility, proper floor drainage should be in place to deal with any excess water from crop watering. Standing water on the floor can be a breeding ground for insects and diseases as well as a potential work safety hazard.
Harvesting
Whether you are marketing your microgreens as living trays of plants or you are harvesting them yourself, you may be required to have a food handling permit and operate within an approved food facility. Be sure to check your local and provincial regulations and requirements prior to production.
The finished product form of microgreens varies, but the most common are as follows:
- fresh cut produce/harvested microgreens
- living tray microgreens/live plant sales
- mixed microgreen combinations
- value-added/processed products that include microgreens
Harvesting microgreens is a major step in the production process, which can be very time and labour intensive. Because of the miniature size of these “micro” plants, harvesting can be rather difficult and should be handled with care. Refrigeration is necessary and recommended as soon as possible to maintain post-harvest freshness, crop quality and good food safety procedures.
Microgreens are typically cut as close to the stem base as possible without contaminating the final product with growing medium or seeds. Keep in mind that the simpler your harvesting tools are, the easier it will be to sanitize them properly.
The method of microgreens cutting varies by the scale of production, but the following methods are common:
- pair of scissors
- electric knife
- very sharp chef’s knife
- hand-held harvesting mechanism
- automated harvesting conveyor system
You may cut the crop directly into the final packaging, but more times than not, microgreens that are harvested are also washed before packaging. If you are washing the microgreens, ensure that you are harvesting them into properly sanitized storage containers.
Washing and drying
Washing the microgreens is a very purposeful step as well as a value-added bonus for your product. The process reassures the customer that your product has been cleaned and is ready for consumption. Furthermore, microgreens are often consumed without further processing or cooking, so it should be assumed that microgreen products leaving a facility will be consumed as is.
Microgreens are already a very clean, but after harvesting you may find seeds, seed husks, root systems and soil medium within the harvested product. Washing and draining the microgreens multiple times will assist in removing these contaminants.
Cold water should be used to wash the microgreens, which lowers the crop temperature slowing down the potential of microbial growth. It is important to properly and completely dry the microgreens to minimize and reduce the risk of microbial growth and contamination.
To minimize shelf life reduction, there should be no unnecessary delays between harvesting, washing, drying and packaging.
Packaging
Packaging can vary depending on the market and who the end consumer will be. The packaging will also assist in product quantity, pricing and marketing decisions.
The packaging should protect the final product from contamination and damage as well as be capable of fitting the required product labeling regulations.
Here are the most common forms of packaging:
- various sizes of clear plastic bags
- small plastic cups with lids
- various shapes and sizes of plastic clamshells
Growers often have differing opinions on what types of packaging maintain or extend microgreens shelf life. The most important factors in maintaining expected shelf life are proper storage and transportation conditions.
Harvested microgreens should be kept at lower temperatures (at or below 4�C) as much as possible to reduce the risk of microbial growth while maintaining freshness. Packaging microgreens in shallow containers should be taken into account as these containers allow for rapid cooling and help minimize potential pathogen issues.
Labeling
A proper labeling system throughout the production cycle should be in place to reduce risks of misidentification and contamination.
For sales and marketing, all food labels, regardless of where products are sold, must comply with federal legislation available from the Canadian Food Inspection Agency (CFIA) (http://www.inspection.gc.ca/food/labelling/food-labelling-for-industry/fresh-fruits-and-vegetables/eng/1393800946775/1393801047506).
Along with regulatory labeling, extra labeling like lot identification (traceability codes) is essential in the event of a product recall and also assists in proper stock rotation.
Specific core labelling requirements must be included on the microgreens label:
- common name
- allergens
- net quantity
- nutrition labelling (unless exempt)
- dealer name and address
- durable life date
- list of ingredients
- bilingual labelling (unless exempt)
Storage/shipping
After harvesting, microgreens should be kept as cool as possible without damaging the product. Minimizing the time the product is left at room temperature should be a required practise.
Microgreens should be stored in a clean, refrigerated area at 4�C or less to minimize microbial growth. A thermometer should be installed and monitored regularly in the temperature-controlled environment.
Microgreens should also be stored in a manner that prevents product damage. Stacking too many clamshell packages or bags of product on top of each other could cause damage to the product at the bottom of the stacks, which raises the risk of faster deterioration of the final product.
While shelf life will vary from species to species and variety to variety, most microgreens will have a shelf life of approximately 5 to 10 days with proper handling and storage.
The high level of care, attention and proper storage put into the product needs to be transferred into the distribution stages. Microgreens need to be transported in refrigerated spaces to reduce risk of contamination and microbial growth. Although it is up to the end consumer to follow basic food safety requirements, growers should advise customers on the recommended handling and storage of the product when opportunity allows.
Using the best practices and proper crop management discussed in this factsheet can give growers the best results for their business goals.
Prepared by
Alberta Agriculture and Forestry,
Dustin Morton and Craig Stretch
More information
Alberta Ag-Info Centre
Call toll free 310-FARM (3276)
Website: agriculture.alberta.ca
Source: Agdex 268/18-1. May 2018 |
|