| | Planning | Dam capacity | Dam design | Spillway design | Construction | Maintenance | Water quality and drought proofing considerations | Summary
An earth fill dam can provide a cost-effective method of storing larger volumes of water for livestock or irrigation. Compared to a dugout, the construction costs for a dam can be much lower per gallon of water stored.
The reason for this cost efficiency is that a dam can store water both behind the dam as well as in the excavated portion of the reservoir where earth fill is obtained for its construction. With dugouts, all the water is stored in the excavation itself.
Most dams have a much larger surface area than dugouts and are shallower. As a result, dams have both higher evaporation losses than dugouts and poorer water quality.
Successful dams require planning, proper site assessment, design, construction and maintenance. Without this attention to detail, dams are in danger of washing out. Dam construction is not a "do-it-yourself" type of project. It is essential to obtain the assistance of experienced water specialists and construction contractors for a dam project.
Planning
Before you start construction, develop a long-term water management plan for the proposed dam. To do this plan, you will need to answer the following questions:
- What water sources do you currently have?
- How much water will they provide?
- How much additional water will be required from the dam itself on an annual basis?
Information for calculating an annual water supply inventory and the daily and annual water requirements can be found in the Dugout Sizing Worksheets that are part of Quality Farm Dugouts - Agdex 716 (B01). This publication is an excellent reference for assessing and planning surface water supplies.
Dams require an approval from Alberta Environment before construction. They also require a license under the Water Act legislation. A set of drawings similar to those shown in Figures 2, 3, and 4 in this factsheet are also required.
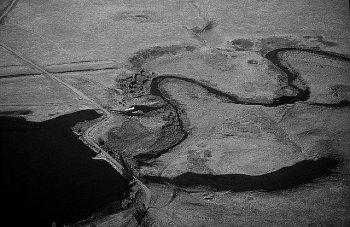
Figure 1. Small earth fill dam - photo courtesy of PFRA.
Site selection is a critical component to the success or failure of an earth fill dam. Consider the following points:
| 1. | The dam must have the potential to fill with runoff (most years) or store sufficient water between runoff events that fill the reservoir. It is essential that the dam and reservoir have sufficient depth and volume to last through extended periods of drought. |
| 2. | Topographical features such as slope, width and height of dam, as well as reservoir capacity will influence construction costs. A topographical survey of the proposed dam site will be required to estimate costs, prepare necessary information for licensing and provide construction details for the contractor. Figure 2 shows a typical elevation view of a dam prepared from a survey. |
| 3. | Soil conditions must be suitable for both compaction and the prevention of seepage losses through the dam. It is highly recommended that some pre-construction soil testing be done at the proposed site or sites. This testing can be accomplished by digging five or six test holes or test pits where the dam and reservoir are to be located. Soils should be checked to depths three feet below that of any proposed excavation for the dam or reservoir. |
| 4. | An assessment of the hazard potential downstream should a dam failure occur. |
| 5. | A good location for a spillway that will effectively handle runoff and minimize erosion. |
| 6. | Watershed activities that can affect the water quality or quantity of runoff. |
Figure 2. Elevation view of dam.
Dam capacity
The water storage capacity of a dam and reservoir (shown in Figure 3) can be estimated as follows:
Dam capacity =
[Reservoir Length x Reservoir Width (at the dam) x
Depth of the Water (maximum)] / 3
Example:
[400 feet x 100 feet x 12 feet] / 3 = 160,000 cubic feet
160,000 cubic feet x 6.25 gallons per cubic foot =
1 million Imperial gallons
This calculation provides a close estimate on steep sided V-shaped water channels, but the accuracy of the estimate is poor on flatter, U-shaped water channels.
Note: The reservoir must store enough water between runoff events for a secure supply and have good storage characteristics to prevent excessive evaporation losses.
Figure 3. Plan view of dam and reservoir.
These factors mean that an average reservoir requires a depth greater than six feet. The storage capacity versus flooded area should exceed a six to one ratio. In other words, more than six acre feet of water should be stored in a reservoir with one acre of flooded area.
Dam design
A typical design of a small earth-fill dam is shown in Figure 4. For stability, the upstream slope must be a minimum of 3:1. Erosion protection is required to protect the dam from wave action. This protection can be achieved with a combination of smaller and larger rocks (or other suitable material) and, with smaller projects, a floating log boom.
The downstream slope requires a minimum 2:1 slope, seeded with native grasses to prevent surface erosion.
The top or crest of the dam should be a minimum of 10 feet wide (preferably 15 feet) to accommodate road traffic and minimize the potential for erosion.
The crest elevation should be a minimum of three feet above the Full Supply Level (FSL) of the reservoir.
The dam should be fenced to prevent livestock traffic, as this traffic can be a major cause of slope and crest degradation.
Figure 4. Cross-section of dam.
Spillway design
The spillway is a critical part of dam construction. An under-designed spillway will result in the dam overtopping or serious spillway erosion during peak runoff. These situations can cause major water losses, potential flooding and damage downstream, in addition to the costs to repair the dam.
In small stock watering dams, a drop inlet spillway structure is cost prohibitive. Cut or natural spillways are most common.
The spillway should be designed with a wide base and a gentle slope, which will reduce water velocity and spillway soil erosion. The spillway base and sides should also be seeded to grass. To prevent spillway erosion, riprap (a collection of loose stones) alone or in combination with geotextile material may be required if the base slope of the spillway is steep. Side slopes of the cut spillway should be no less than 2:1 (4:1 slopes are preferred).
The spillway should be located away from the dam fill, not through or directly adjacent to the fill. This placement will reduce the risk of the dam washing out. Culverts are often used in spillway design, and if undersized, they can restrict spillway flow and result in project failure.
Construction
Stripping
The area covered by the base of the dam must be stripped of all vegetation and organic soil. The organic soil can be stockpiled and used on the downstream slope of the fill. All slopes steeper than 1.5:1 on sides of draw should be flattened to minimum of 2:1.
Key trench
A key trench (cutoff trench) is excavated below the base of the fill upstream of the centerline of the fill. The key trench is incorporated in the design for two reasons: to anchor the dam to the base material and to prevent piping (seepage under the fill).
The key trench should be a minimum of three feet deep for a dam the height of 10 to 12 feet. It should extend the full length of the dam and reach one third to one half of the way up the side slope of the draw.
Fill construction
The dam must be constructed from an impervious (clay or clay-based) material. A simple field test to determine the suitability of the material for compaction requires adding a small amount of moisture to a handful of material and then mixing to the consistency of putty.
Next, try rolling the material between the palms of your hands. The material has good compaction characteristics if it can be rolled to the diameter of a pencil, approximately six inches long, then bent into a loop without separating the material. Several attempts may be required to obtain the proper moisture level to do the test.
Construction material taken from the surrounding hillsides or an excavation in the reservoir area must be placed close to horizontal in the fill in six inch layers and compacted. If the material is dry, moisture will have to be added, and suitable compaction equipment such as a sheepsfoot packer used to obtain the proper compaction.
A simple test to evaluate proper compaction is to place the edge of the heel of a hard-soled boot on the fill and push down hard with all your weight. If only a mark is left, compaction is satisfactory. If the heel sinks in, compaction is poor. No rocks over six inches in diameter should be placed in the fill.
Start construction by filling the key trench with well-compacted material, and continue adding six inch layers until the maximum height is obtained. The top of the dam at the center of the draw should be built 10 per cent higher than the design to allow for settlement of the fill.
A riparian pipe should be placed through the bottom of the fill during construction, along with a frost-free valve (curb stop) set well back in the fill to ensure frost protection. This pipe and valve system will allow water to be released downstream to a stock-watering trough, or to other water storage facilities during times of water shortages.
Maintenance
Earth fill dams require regular inspection and maintenance. An inspection before spring runoff is critical to ensure the spillway is not blocked with snow or other material. All blockages must be removed to prevent overtopping and the dam washing out. During runoff, additional inspections should be carried out to watch for signs of erosion, spillway blockages (ice or debris) or overtopping of the dam.
After the dam is free of snow, a visual inspection can be completed to assess the slopes for erosion, rodent damage, seepage or slumping. Burrowing rodents such as beavers, muskrats and gophers should be removed from the dam immediately. All potential problems must be repaired as soon as possible to safeguard the dam. Side slopes should be cleared of tree growth on a regular basis.
Water quality and drought proofing considerations
There are a number of ways to improve the water quality in a dam. At the planning stage, avoid sites where watershed activities can allow poor quality or contaminated runoff to enter the reservoir of the dam. Examples of these sites include heavily cultivated fields or areas where a heavy concentration of livestock manure exists.
The design of the reservoir can also help improve water quality. The deeper the excavated reservoir, the better the water quality and the more drought proof it will be from evaporation losses.
Stripping the topsoil from the flooded area of the reservoir will reduce the amount of nutrients available for plant and algae growth. The more plant and algae growth generated, the more rot and decay are generated and cause the water quality to deteriorate. Regular treatments to help control plant growth will help maintain water quality. To chemically control problem weeds near water, herbicide treatments need to be selected appropriately.
If water is being removed with a pump system for year-round farm use, a floating intake system is recommended to help improve the quality of the water removed from the dam. Both natural wind aeration and the addition of compressed air with a windmill or electric compressor will greatly enhance water quality.
For more information on improving water quality, refer to the Quality Farm Dugouts manual as the same principles for improving water quality apply for both dams and dugouts.
Summary
Earth fill dams are a good alternative to dugouts where larger volumes of water must be stored at a reasonable cost and suitable site conditions exist. Proper design and construction is essential for dams; otherwise they will fail from washouts or seepage losses.
If water quantity is your main priority, then a dam could be the best option. If better water quality is the important factor, a dugout is probably a better option. Take the time to properly plan, construct, inspect and maintain your dam, and it will be a valuable water resource for your farm for many years to come.
For more information
Additional information is available through Agricultural Water Specialists or on the Alberta Agriculture and Forestry website.
Agricultural Water Specialists can be contacted through the Alberta Ag-Info Centre at 310-FARM (3276).
Prepared by
Farm Water Supply Section
Alberta Agriculture and Forestry
References:
Agriculture and Agri-Food Canada
PFRA Small Dam Design and Construction Manual, 1992
Alberta Environment
Inspection of Small Dams, Publication No. T/434
Dam and Canal Safety Guidelines, Publication No. T/444
BC Ministry of Agriculture and Fisheries
Site Selection for an Earth Fill Dam, 510.100-1 Agdex 754
Maintaining an Earth Fill Dam, 510.100/2 Agdex 754
Construction Guidelines for an Earth Fill Dam, R510.100-3 754
Alberta Agriculture, Food and Rural Development
Quality Farm Dugouts, Agdex 716 (B01), April 2002
Source: Agdex 716 (A20). Revised September 2015. |
|